Showing posts with label amy butler sew-along. Show all posts

Friday, July 1, 2011

Oh Amy!

Of all the bags in Amy Butler's Style Stitches book, I dreaded making June's Teardrop Bag most.


It's aptly called Teardrop Bag because tears were shed when I made the bag. So what exactly was I dreading? Take a good look at the hip area. Yep, Miss Piggy's ears.


Ah, here's a closer look. I'm not kidding. The ears have to be attached to the hip of the bag.


Does the leaf fabric look familiar? It's another Ikea fabric. It's a popular fabric. In fact, if you go to Etsy, chances are there is at least one bag, usually a large one made in this fabric.


So how hard was this bag? It's nowhere near as hard as The Cosmo Bag, that's for sure. The Cosmo Bag turned out to be such a great bag. I love it to death. I use it all the time. Originally I had thought it was too big but I carry a lot of junk in my bag so the size is perfect for someone like me. Let's see. I need my emergency medication kit, an umbrella, paper towel, keys, giant wallet, thick jacket (in case it's very cold), thin scarf(in case it's not that cold) and a book.

I've made plenty of pleated bags. Pleated bags aren't hard. I was so confident I could finish it in one night.

I was so wrong.

I had been stung by Amy Butler's bags before so this time I read thru' before I started. There are 2 sizes and I chose Large. Haha. Large turned out to be not so large. I also noticed that the template for the handles was rather narrow in width. I told myself I would widen the handle.

See? I felt pretty confident because I did my homework.

Cutting the pattern pieces was easy. The handle took a little longer. When cutting long pieces of fabric, I like to do it on the floor. There I was kneeled down going snip, snip, snip. After I was done, I almost screamed. Noooooooooo! I had forgotten to widen the handle!

Still not a tragedy. I could make it work. A narrow handle is still doable. Just harder to turn right side out. Those of you who chose Small. I feel for you. It must have killed you to turn the handle right side out.

Everything went smoothly from then on. Until I had to attach Miss Piggy's ears to the hip of the bag. I don't know how other sewers did it. For me, I forced it. I don't know how else to do it. I pleaded with Miss Piggy. I begged. I cried. No can do. So I just hammered it on. Worked like a charm. I was sooo relieved until I remembered I had to attach the other ear.

You understand while all these sewing and struggling was going on, me hubs was sitting next to me and I was grumbling to him. Grumble, grumble. Unlike most of the time when he faked interest, this time he actually gave an opinion. He wondered if I had problems sewing Miss Piggy's ears because my sewing skills were not up to the level required?

What?!

How is that possible? I ask. I mean, if my expert sewing skills get any better, I would LEVITATE.

Did I make anyone laugh? Yes, I did. And no, I've not reached expert level. Yet. Right now, I'm at Level Awesome. But I'll get to expert level when I complete my 1,000 Projects Before I Die.

Anyhoo, back to the story. By the time I was done, I was so frazzled I decided nothing and I mean nothing could soothe me except a Cookies n Cream cone ice-cream. So Amy, that extra bit of fat round my hips is on you.

After that, all I had left was the lining and the lining is usually the easy part. Let me repeat that. The lining is usually the easy part.

It was not. The pocket got in the way. I tried to fit the pocket to the lining and the pocket just wouldn't fit. I squeezed and did a mock-up and showed it to me hubs and he said, it looks weird. Finally, I gave up and went to bed full of self-pity listening to "If I die young" by The Band Parry. Yes, that full of self-pity.

This morning after the kids had left for school, I decided to tackle the pocket once again. Then I had a clever idea. I googled for other sewer's blog post on this bag to see if they had the same issue. Guess what? There is an error in the instructions and the correction was given here. Which explained why the pocket did not fit.


I only had an hour to sew this morning so I decided I would just use the pleated lining as a template for the pocket. My best decision to date.


Because the pocket was large, I simply sewed a little square to anchor the pocket to the lining somewhere at the top centre.


Is this worth the effort?


Check out the ears.


There is no way all my stuff could fit into this little bag. Oh, I just peeked at July's bag and it looks like a piece of cake.

This sew-along is hosted by Bree from My Crafty Crap.

Tuesday, May 31, 2011

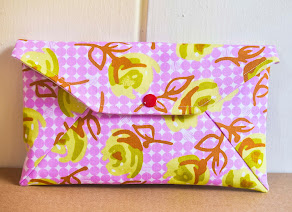
Amy Butler Style Stitches Sew-Along for May - Perfectly UnPleated Clutch


It's the last day of May and I just made it for my Amy Butler Sew-Along's May bag. The first thought that came to my mind when I was going through the instructions was:
I hate the handle.

The second thing thought was:
It's gonna cost a lot of fabric to make those pleats!

First of all, I don't like handles which look unbalanced. I just bothers me. But in the spirit of the sew-along.... Second of all, when I took a look at the amount of fabric required for the pleats, I almost fainted. For the SMALL clutch alone, you need 2 pieces of 8" X 54" of fabric.

All the "in the spirit of the sew-along" couldn't convince me to invest that much fabric in one clutch which if you look at closely is really just another zip pouch. So I made an Unpleated Clutch.


Seriously, without the pleats, the clutch looks boring. I'm almost embarrassed to post the photos!


This is what it looks like without the handle.


I just want to lop off the handle!

Is it just me? Sorry if I come across as rather negative about this "clutch". Maybe it's just my fabric choice? If I ever make this clutch again, I'll first of all, bury the handle in the deepest ocean and secondly, do something about those crazy pointy ends.

Sunday, May 8, 2011

Balance Checkbook Cover for Amy Butler Style Stitches Sew-Along

Hello all,

I had been looking forward to making my checkbook cover and I couldn't help but use the MoMo fabric which I had always adored.


I made this on Cooling Off Day which turned out to be a super hot day. How apt. Cooling Off Day falls on the eve of Polling Day when all election campaigning is disallowed. I was already getting sick of the campaigning news so I was just happy to be able to do some sewing in peace and quiet. But I then got very, very upset. See this checkbook cover is for me. I have a chequebook which I keep losing so I thought this would do the trick. Instead of searching for my chequebook, I would search for the checkbook cover. Now, after I had cut out all the pieces of fabric needed, it occurred to me to take out my chequebook to see if it fits. Guess what? It doesn't.


Now you understand that I have already cut out all the fabric needed. Why it didn't occur to me to check before I snip snip is beyond me. As it turned out, Singapore chequebooks must be way longer than American ones. Do I have any American readers? Please do me a big favour and fish out your checkbook and tell me what the measurements are?

I've always assumed all checkbooks have universal measurements. Like passports and credit cards. Anyhoo, I woke up on Saturday, which is Polling Day to firstly vote followed by another round of cutting of fabric. I just made everything a little longer.


See, now it fits.


In keeping with the spirit of the sew along, I tried to follow the sewing instructions as much as possible. The only thing I don't like is the placement of the snaps. I prefer to place them as close to the edge as possible. Somehow I don't see myself making another one of this cover.

On to other news. Well, the Election results are out. We're still a one-party ruled country. No surprise. The big victory for the opposition is the capture of a GRC which is a Group Representation Constituency. GRC was created in 1988 comprising of 4, 5 or 6 members to contest as a group. In all, 14 GRC (a total of 69 seats) and 12 single-member-constituencies were being contested. Since the creation of GRC, the opposition has only been able to capture SMC. So, it is a big victory for the opposition. The final result? 60.1% voted for the ruling party. This translated to 81 seats for the ruling party and 6 seats going to the opposition. If you think mathematically it sounds wrong, go back to my explanation of GRC. And you may think 6 seats is pathetic but in the last election only 2 seats went to the opposition.

So a big win for the opposition but only a tiny step towards a better Singapore.

What does the majority of Singaporeans want? Clearly, they want the ruling party to form the government but the dip in popular vote shows a growing number who wants change. How the ruling party treats the loser candidates, critics and netizens who had spoken up openly during the Election campaign period will be an indication of which direction this country is heading. With the end of election, I think I will go back to my sewing and beading which are really far more exciting (to me). See ya.

Tuesday, March 29, 2011

Origami Bag Set

This week I continue my journey thru' Amy Butler's Style Stitches Sew-Along. If you haven't heard of it, what happens is each month this year, I make 1 bag from the Amy Butler's book. So far I've made The Cosmo Bag. February came and went and no bag. I read the instructions for February's Reversible Everyday Shopper and came to this conclusion:

It's really just a tote with a giant front pocket. See for yourself.


Take away all the props and the bag is just a regular rectangular tote. This kind of bag, I've made enough of already. That's why I skipped February.


This is the March bag. It's called Origami Bag Set. Sounds exciting, doesn't it? Tell you a secret. It's really just a zip pouch. (apologies to Amy Butler)

No surprise I was excited by the Origami Bag Set. Sure, I've made a total of 158 zip pouches to date. Staggering, isn't it? But I'm always intrigued to see how other sewers construct their zip pouches.


There are a total of 6 sizes to choose from. I did not make all 6 sizes. Just the mini. I chose this size because it's longer than what I would normally go for. Btw, Amy Butler's sizing is quite different from most humans. This pouch is MINI. Take a look at the pic where I put a pen for sizing. Trust me. This ain't no mini.

As it turned out, how Amy Butler sews her zip pouches is a method I've used myself. When you do it her way, you can topstitch the exterior and the lining together along the seam where the zipper is. The only annoying bit is you can't sew the zipper to the fabric from end to end. You have to leave 1/2" of side seams unsewn at the ends.

When I want to sew zip pouches quickly, I do it my way where I just sew from end to end for the zipper bit. The difference is I can only topstitch the lining. But that's okay because the exterior fabric won't get caught in the zipper. It just gives a different look.

I'm actually looking forward to April's Checkbook Cover because I have a cheque book which I keep losing! See you soon.

Wednesday, February 2, 2011

Cosmo Bag

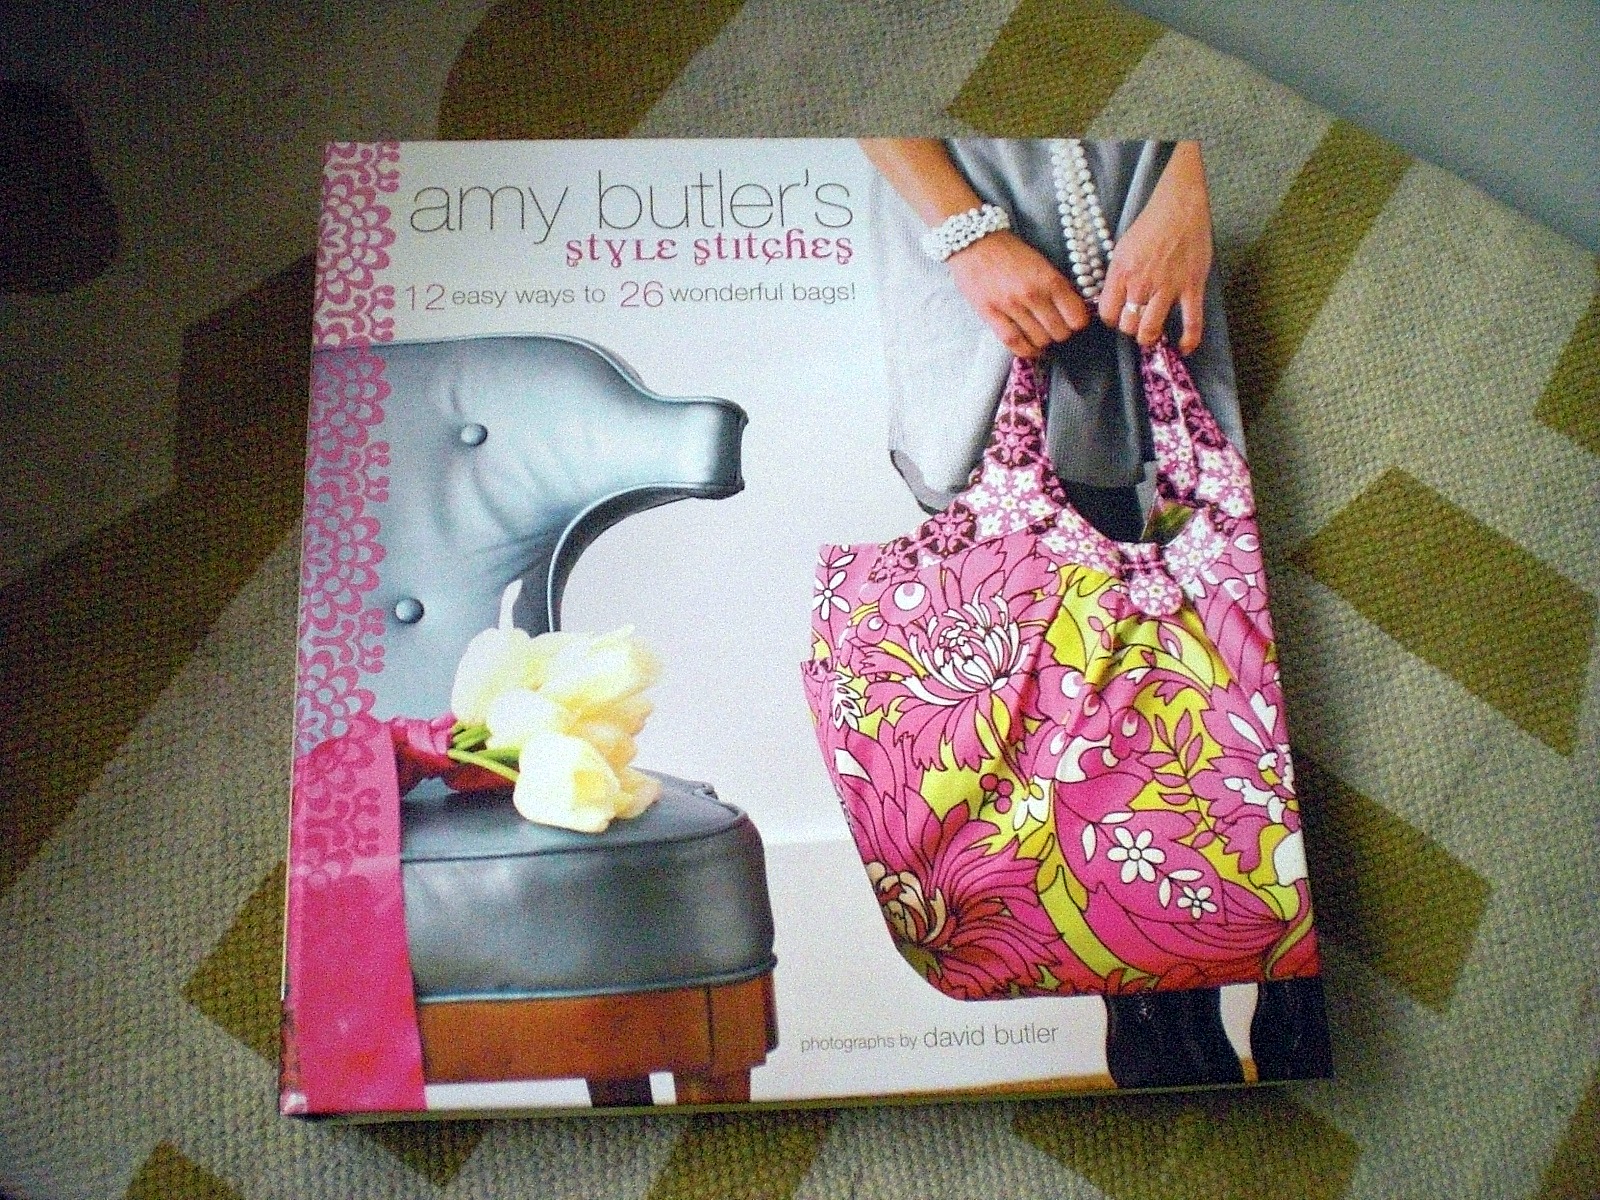
I mentioned in a previous post I was sewing a-long to Amy Butler's Style Stitches Book. The first bag to make is the Cosmo Bag. It is finally completed. My intention was to follow the instructions as closely as possible and not end up making the bag my way.

But I discovered I don't read so good. In my defence,  the instructions are very wordy. It's a lot to read and absorb. Lines after lines of instructions.


The first mistake I made was totally no excuse - just plain ole carelessness. I used the lining template to cut both the exterior and lining fabric! Ok, I saw what the Cosmo Bag should look like. I looked at the lining template thinking this template doesn't look right for pleating. Still I went ahead and snip, snip, snip.
The bag on the cover of the book is the Cosmo Bag. It has pleats around the band. Yep, horrors. When I discovered my error, I had already used up most of my 1 metre Ikea black and white butterfly print fabric. My first instinct was to go get more fabric which I did but it was completely sold out. My second instinct was to cry.

I decided to salvage what I had already cut because it is A LOT of fabric. The only question was: Do I still use the band? I had told Bree who's hosting this Sew-a-long my booboo and she suggested doing without the band and the pleats as well. The thing is, I didn't want to waste the band so I decided I to just hammer the bands on. With that out of the way, I proceeded to do the handles which look like a real pain to do.
What you see here is just 1 out of 8 pieces of the handles I have to sew on the main panel. I don't like to sew convex to concave curves. It's just against the Law Of Stretchiness. Amy Butler's instructions for this super-human task are "easing the band around the curve". Ok, you can't ease the band around the curve. You FORCE it. As for me, I sewed a stay stitch and clipped like crazy. But I didn't want to do it for 7 other handles! So I gave the fabric no choice. I held it at gunpoint. It worked!
But the handles did not match the main panel as exact as I wanted. So I had to snip, snip, snip. At this point, I decided I would sew the bag my way should it differ from the instructions. This bag was starting to get on my nerves. Oh Amy!
The side gusset really made the bag ginormous. I mean, the main panel is huge enough. You could fit a young child inside.

This is the inside. I used the opportunity to use up my fabric remnants.
For the exterior, I ditched the pocket at the side panel but I put a little patch pocket on the front panel. Plus, I don't like button closure so that went too.

Finally, the most frustrating part to sew - the inner and outer circles of the handles. I read the instructions and decided I would do it my way. Umm, you know how a scrunchie is sewed?

I absolutely regret the choice of fabric. It's too stiff for a bag with this amount of curves. As a result the finishing is a little off.

Some sewers are saying in blogland this bag is easy to make. They must be way ahead of me in terms of sewing because I just found it frustrating. My recommendation? Try other bags in the book first before making the Cosmo Bag if you're not a regular sewer.

Friday, January 21, 2011

How To Tell Chinese New Year Is Round The Corner

Ways to tell Chinese New Year is Round The Corner:
ONE - lanterns are the favourite decoration in shopping centres.
TWO - older women appear with tightly permed hair.
THREE - long queues form outside banks. (to get new notes)
FOUR - red packets become prized goodies.
FIVE - strange looking food appear in my fridge.
SIX - bald looking plants are sold everywhere.
SEVEN - traditional TONG-TONG-CHIANG Chinese New Year music is played everywhere!!!
EIGHT - a sea of RED everywhere you go.
NINE - traditional PING-PLIANG-PONG Chinese New Year music is played everywhere!!!
TEN - a sea of RED everywhere you go.


Let me explain the strange fishes in my fridge. Okay, actually I can't. One morning I woke up and there they were living in my fridge. Me hubs who apart from hoarding books, CDs, DVDs, T-shirts and shoes, can't bear to see food thrown away. So he rescues free food from the office which no one wants to eat. The 2 fishes signify abundance, I think. They belong to the custard family. I'm not eating them. Would you eat them? They look gross. Me kids don't eat anything in the jelly or custard family despite all my attempts as a mother.
Have I ever told you the name of these bald looking plants which almost every Chinese home worth its salt will have for decoration? Promise me you won't laugh if I tell you. Ready? Pussy Willow. Did you laugh?
When the buds bloom, the plant will look like this. No Pussy Willow has ever adorned my home. We keep it free of any hint of Chinese New Year.

In case you're here for my eye-catching bags, let me introduce you to my green polka-dotted mini zip handbag.
I love making mini zip handbags. The handles took the longest time to make though. One thing that's been bugging me lately is I haven't found a way to make such handbags using a single handle - you know from end to end? I could only insert the handle via the side seams but that's not what I want. Oh well, something to obsess over.
I mentioned in my last post I was doing the Amy Butler's Style Stitches Sew-along? I'm afraid my progress hasn't been good. Thing is, I realised that I have to use the templates which came with the book. But I'm not having the courage to cut them! So I have to trace them out. Oh, it's such a chore. But at least I have laundered the fabric chosen. In a week's time when I'm done with the tracing... I'm kidding. I shall sacrifice the templates. See ya.

Thursday, January 20, 2011

Amy Butler Style Stitches Sew Along

amybutler-button2

The 2nd half of 2010, I kinda felt I hit a plateau in my sewing. When I started teaching myself to make bags, I only learnt to make 2 basic items - a zip pouch and a drawstring pouch. Based on these 2 models, I experimented with other combinations and each time I tried something new, I felt such a rush. But the last few months, mainly due to my commitment to too many craft markets, I made mostly items which could sell. That meant I made items I had made before - the variety only came in the fabric or small nips and tucks. I think if I were to carry on like this, it would surely kill my passion for bag-making.

This year, I decided I would make a wider variety of bags and try techniques I would not normally use. But I'm realistic enough to know I'm not that creative to be able to come up with a large variety of bags to experiment with. I had experience with store-bought bag patterns in my early bag-making days and the icky thing is the patterns are printed on very thin paper.  And the paper sticks to you. Plus, I can't make head or tail of the instructions. It's worse than reading Chinese! But surely the most horrid part is each bag usually comes in a million pieces of templates. Yes, yes, I'm exaggerating.

So I'm participating in Amy Butler Style Stitches Sew Along. What attracted me was the book which had all these fab bags made in Amy Butler fabric. Plus it's in English!
Today the book finally arrived from Amazon. Me hubs bought it for me. If it were up to me, I would go to Borders. I guess I'm still feeling stung over the Sashiko embroidery thread which never arrived and not getting any refund.

Anyhoo, this Sew-Along is hosted by Bree of My Crafty Crap. The first bag I will make is the one on the cover - The Cosmo Bag. I haven't started. I just got the book! The idea is to make 1 bag a month. So I guess you'll be seeing 12 new bags this year.
Related Posts with Thumbnails

My Bag Pattern Shop

https://www.etsy.com/shop/projectsbyjane

My Applique Patterns

https://www.etsy.com/shop/projectsbyjane?section_id=15580078&ref=shopsection_leftnav_2

My Embroidery Patterns

https://www.etsy.com/shop/projectsbyjane?section_id=15580078&ref=shopsection_leftnav_2