Wednesday, February 25, 2009

Front Zippered Pouch - without the gaps


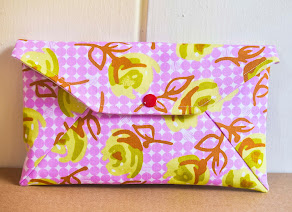
I've been busy. This is a lined front zippered pouch I have just completed. Previously my personal favourite was the one I made using Thimble's tutorial. It is a great tutorial and I would use it again. The only thing was there were 2 little gaps at both ends of the zipper .


These gaps (picture of pouch made using Thimble's tutorial) aren't a problem really as you wouldn't notice it when you use the pouch.

It's just that I like to figure things out and I just believed that it's possible to construct a front zippered pouch without the gaps. That's me obsessing again. Well, after days of experimenting, I've managed to achieve it.


Front view


Back view


Inside out. No gaps.

I'm sure many people already know this method of constructing a front zippered pouch. If you don't, I'll be happy to post a tutorial. Kindly leave a comment in this post so I'll know there's a demand.

C ya.

Thursday, February 12, 2009

Patchwork Garden

I love to make bias binding handled bags as I think they are very interesting in a casual/attractive kind of way. You definitely can't make such bags if you don't have the skills to handle bias binding. Having invested in 2 Clover 3/4" and 1" bias binding maker, I can easily make them with my choice of fabric. One thing about the choice of fabric, you need a sturdy fabric because you're using it as a handle and you don't want the fabric to tear easily.

Funny thought. Singapore uses the metric system and I know km, m, cm, mm and so on. But when it comes to sewing, I think and sew in inches. I think it's probaby the influence of the American blog/tutorials I visit. Usually I buy my fabric from Spotlight which sells fabric in metric system. Recently, I went to Chinatown (yes, there is a Chinatown in Singapore) and I discovered a fabric market which sells fabric in yard! Who are these people? I'm so intrigued by my discovery.


For this patchwork garden bag, I used all my floral fabric and patched them together. Between the handles, I did some small pleats.


This is the back.


I used a nice plain pink button - don't want to overcrowd.


The inside is pink too.

For my next bias binding handled bag, I'm thinking I want to make the body longer. Look out for it.

Wednesday, February 11, 2009

Roly-Nesters. What?

Although I dislike encasing my raw seams in bias tape unless it accentuates the bag, I make an exception for roly-nesters. A reader, Pfirsch, suggested Roly-Nesters which has a tutorial to create rather matronly boxy pouches. The technique is pretty simple. You make it like an unlined boxy pouch but you hide the raw seams in bias tape. The result is of course not as spectacular as ahem, my own Lined Zippered Boxy Pouch Tutorial. But it's a technique you can use when your outer fabric and lining are joined together.


For my little pouch, I was trying out free-motion quilting and I did it on my little sandwich of outer patched fabric, flannel interlining and lining. Since the sandwich is gelled together by the quilted lines and also the sandwich is rather thick, I felt the roly-nester way was the best option to create a boxiness.


This is the bottom. My free-motion skill is still shaky. It's really hard.


Here's the pouch inside out. I forgot to change the bobbin thread to match the zipper so it's all glaring.


Not too bad.
Related Posts with Thumbnails

My Bag Pattern Shop

https://www.etsy.com/shop/projectsbyjane

My Applique Patterns

https://www.etsy.com/shop/projectsbyjane?section_id=15580078&ref=shopsection_leftnav_2

My Embroidery Patterns

https://www.etsy.com/shop/projectsbyjane?section_id=15580078&ref=shopsection_leftnav_2