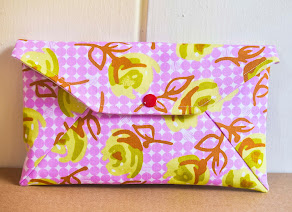
A few years ago, I casually promised some folks I would write a tutorial on how to sew my fabric brooch. Well, it's a few years later today and I finally got round to it. Better late than never right?
To be honest, I remembered my forgotten promise upon finding some of my unfinished brooches from years gone by when I was peddling my craft at shopping malls.
How To Make A 2" Round Fabric Brooch
Supplies:
- small amount of fabric
- small amount of batting
- paper to print + printer
- your choice of transfer tool/pen
- embroidery floss and embroidery needle (the eye should be able to fit 3 to 4 strands of embroidery floss)
- brooch pin
- small amount of felt (optional)
- scissors
2. Choose the desired animal motif and transfer to fabric.
Here are a few transfer methods.
a. Place fabric over printed animal motif template (use actual not reverse). Place against window (or some light source) and trace onto right side of fabric using either a pencil, frixion pen or a water soluble pen. Your choice.
b. Trace motif (use actual not reverse) to fabric using dressmakers carbon paper.
c. Use a transfer pen to trace over animal motif (use reverse not actual) on paper. Place paper (traced side down) on fabric. Iron over paper to do the transfer. You might need to press hard on the iron and go back and forth several times before you get a good transfer.
d. Draw freehand on fabric. Use a pencil, frixion pen or water erasable pen. (this is the method I usually use)
This is my transfer using a transfer pen. I got it smudged because I moved the paper while ironing. I chose the pig which is a drawing by my daughter when she was little.
3. Using 2 to 3 or 4 strands of embroidery floss, sew using backstitch over the outline of the animal motif. The image above shows how I sew backstitch. Some people do it slightly differently. But the end result is the same. For eyes, you can use a single straight stitch or 2 straight stitches (sew like X or +)
p.s. If you aren't into embroidery, use a fabric pen to draw/colour the animal motifs. Place hot iron over your work to set the colour. (protect your iron by placing a hanky over your work) The colour will become slightly muted.
4. Once your embroidery is complete, place the 2.75" template with the dotted line cut out over the embroidery. The hole in the middle helps you to keep your embroidery centered. Draw around the larger circle. Cut fabric exactly on the drawn line.
5a. On right side of embroidery, using regular sewing thread, sew running stitches around the edge of the circle.
b. Place the 2" template with a little hole cut in the middle (for easy removal) on the wrong side of embroidery. Pull the thread tight. You can adjust the position of the template until all is good. Knot off your thread and place hot iron over your brooch front. This will create a crease of the 2" circle. Remove 2" template. Place hot iron over brooch front one more time.
p.s. sometimes I like my brooch front to feel slightly stiffer so what I do is instead of the 2" paper template, I use a 2" stiff fusible interfacing. (grainy side down on wrong side of fabric) After the hot iron is placed over it, it will fuse to the fabric.
6. For the brooch back, create a duplicate of the brooch front, except this time on a plain fabric.
7. I like to add a layer of batting (or felt). If it feels bulky around the edges, cut the batting slightly smaller than the brooch.
8. Sew brooch front to brooch back with layer of batting in between. I use 3 strands of embroidery thread in a colour close to the fabric.
9. Sew brooch pin to the back. Do check placement of embroidery before you sew. Your stitches will definitely show. Don't worry about it. Hide your knots under the pin.
Alternative brooch back
a. Sometimes I prefer to use felt for the back. Use the template for felt backing. It is just a teeny bit smaller than the size of the brooch front. Cut from a sturdy felt. (I used a $2 Daiso felt)
b. Put batting between the front and the felt.
c. Sew felt to front. I usually use a thread that is closer to the colour of the felt. It's ok for the stitches to be visible.
d. Sew brooch pin to back and you're done.
I hope this little tutorial helps you. Please feel free to embellish your brooch in any way you like. Check out this little pig brooch above. I used scraps of felt to give the pig some colour.
This bird brooch above uses a slightly oval shape. Can you believe I cut the shape by hand? Just fold a piece of card stock into four and cut a curve. Your shape may not be perfect but sometimes I think an imperfect shape for a brooch looks more interesting. Have fun!


0 comments:
Post a Comment