Early this year, my daughter needed a black basic skirt for an interview and we searched many shops for one. To our shock, it either costs way too much (like over a hundred bucks) or it had weird designs. In the end, we settled for a reasonably priced dark blue skirt which did not fully meet our brief but it was the closest we could get. The search left me utterly exhausted. I decided I would try to make a basic skirt for myself and when I'm quite good at it, I'll make one for my daughter.
Shockingly again, it was impossible to find a basic skirt pattern at Spotlight. I stood at the patterns counter for over an hour and came up with nothing. So I had no choice but to draft the skirt myself. I've drafted a basic skirt before and honestly it's not something I enjoy. But a mom's got to do what a mom's got to do.
I dug out my old drafting book and decided on the most basic skirt - the A line skirt. If you go to sewing school to learn dressmaking, this would be the second skirt you learn. The first one is the skirt with an elastic waistband.
The pattern has 2 darts in front and 2 darts behind. Other than a patch pocket, there's no other design features. Since I drafted this pattern myself, if it turns out bad, I have no one to blame but myself. Ha ha. No pressure.
I made the skirt to fit me very well so it is very unforgiving. I can't put on weight! I should wear this skirt at least once a week to keep me from getting fatter.
I used a cotton drill fabric which I probably bought a long time ago for a client but never got around to use it for a bag. This fabric is so not me so I thought why not use it to make the skirt for myself? So #yolo right? The amount of fabric I had was just perfect for the pattern and I felt so pleased with myself for using up another meter of fabric. Then one day I opened the storeroom and found ANOTHER meter of the exact same fabric.
The front of the skirt has a pocket for my iPhone. Is it funny to have one pocket on a skirt? I felt one pocket suited the look of this skirt. Plus, it's camouflaged.
I'm so pleased with the placement of the pocket. When I wore the skirt, the pocket was exactly where I wanted it. Sometimes I get so lucky. I used
this pocket template but I made it narrower and shorter to fit my iPhone.
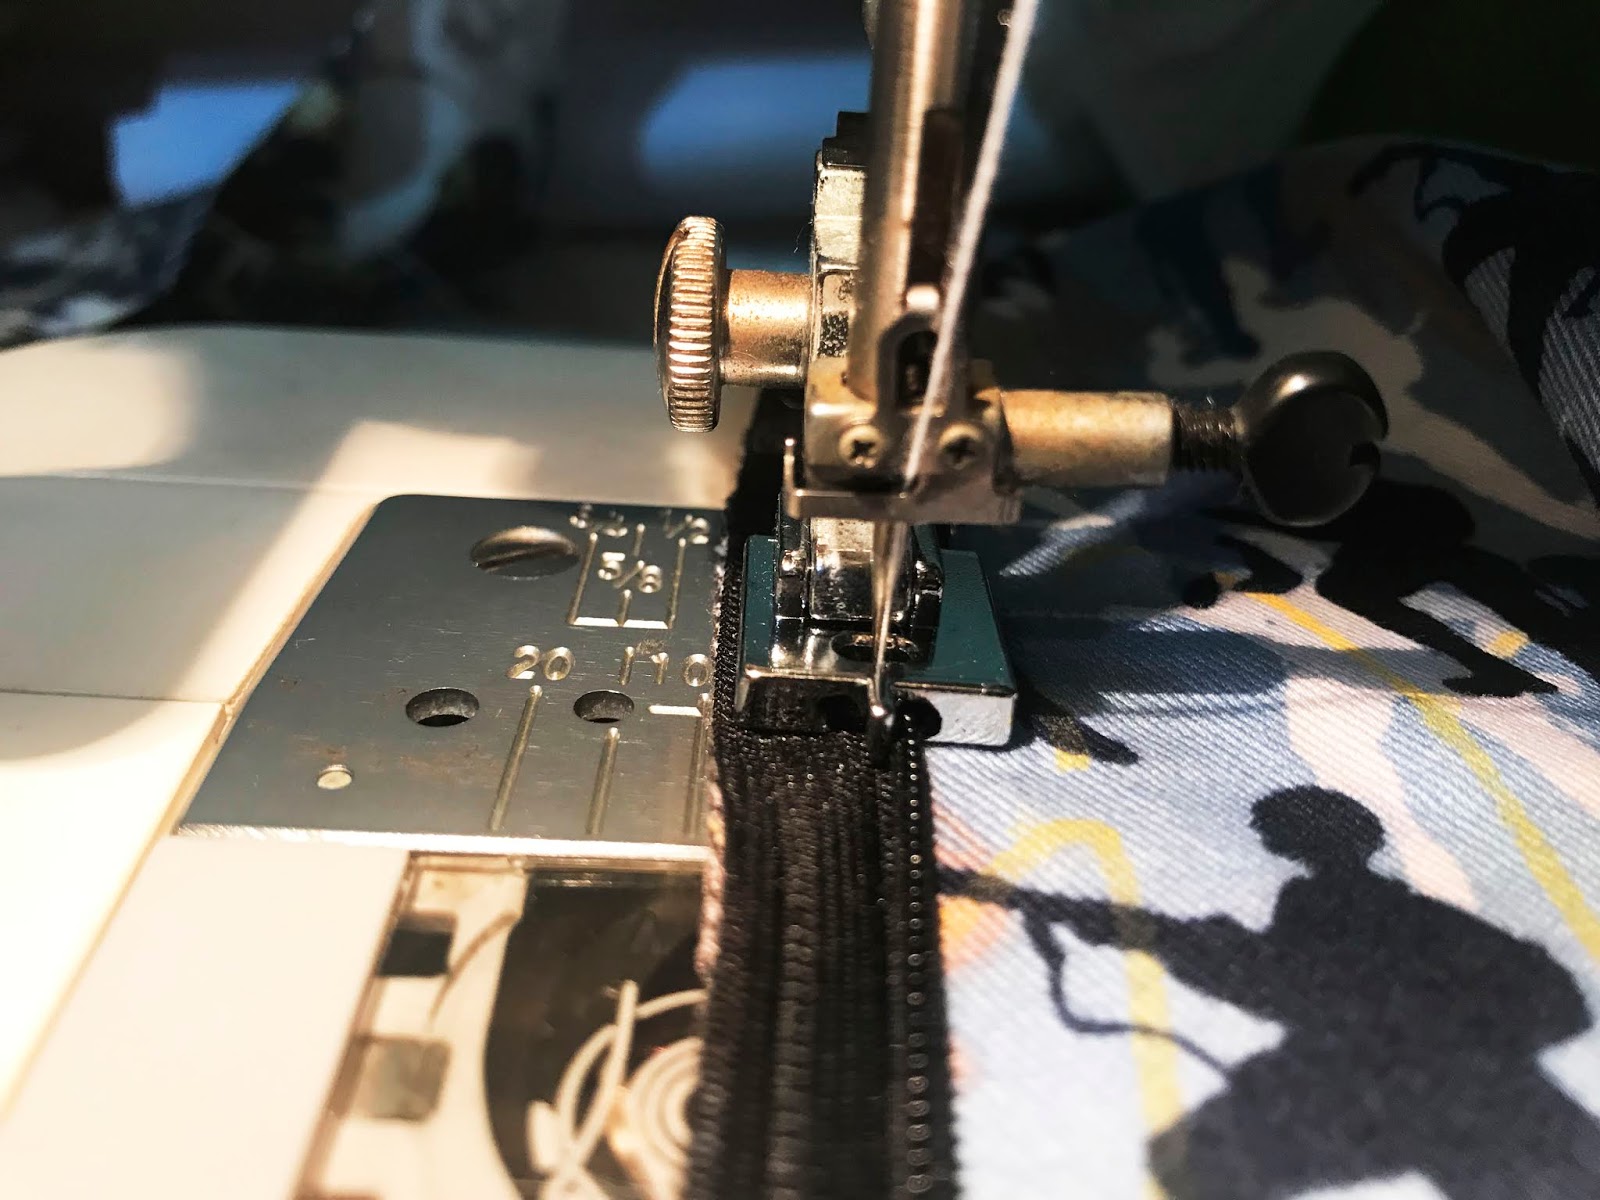
This skirt closes at the side with an invisible zipper. I used a Janome concealed zipper foot to sew the zipper and it was a breeze.
I read that some sewers iron their zipper coil open before sewing the zipper onto the fabric. I think that's so tedious and unnecessary. With my concealed zipper foot, the little metal in front does the job for me. As I sew, it pushes the coil open. No pinning required, just voom, voom, it's done. I love this zipper foot.
You can't tell there's a zipper at the side seam.
Originally I was going to use facing for the inside waist. Then I thought cotton drill is a pretty tough fabric and maybe I was lazy or maybe I wanted to try out a 1/2 inch bias binding. So a 1/2 inch bias binding it is. The sewing was very smooth, nothing went wrong. No crinkles, wrinkles or pleats.
So overall I'm very pleased with the skirt. I'm not going to pretend it's a fantastic skirt. It is a very basic skirt and it fitted me perfectly. I made it low waisted or so I thought. During the photo shoot, I noticed that I could wear the skirt both low waisted and high waisted. Either I had lost weight or I didn't measure very well...
The colour of the skirt as well as fabric print is quite an unusual choice for me. I found it hard to match and finally wore a Hush Puppy tee shirt paired with Crocs slippers.
I asked hubs to take a view of my back and this was what I got. The final length of the skirt is 19 inches by the way.
And yes, I wore the skirt out. In fact, the pic above was taken at Decathlon.
I asked my girl to try on the skirt and unfortunately, she said she's not used to "this kind of skirt". I think I need to tweak this skirt further - maybe a waist band or facing?


1 comments:
I think it turned out quite well. The fit is good. Now just add an inseam pocket.
Post a Comment