Thursday, August 30, 2012

If fabric were food

The lady whom I buy my fabric from at Malin Textile sure knows my weakness. My last visit to her shop at Chinatown, she showed me some houses fabric. I immediately went into cardiac arrest. Upon my recovery, I bought all the blue and mustard houses fabric she had. Thankfully, she didn't have a lot left. Otherwise I was in danger of spending the month's food allowance on fabric. And you know,

YOU CAN'T EAT FABRIC!


Made two sexy zippy wristlets and one get up and go go sling bag. Nothing earth shattering. In case you're salivating over these fabric, they're Fumika Oishi from D's Selection.


I still have more of the Ricco ricco houses fabric so I made 1 crescent bag. You know, I've no idea if I've made a crescent bag out of this fabric before. I've made so many bags.....

Today was one of those days that rained the whole day. It just stopped but still I couldn't take any decent photos. To be honest, the cold weather is really good for staying home and lying in bed. Unfortunately, I was sewing in the afternoon. I suppose this nice cool weather might not be too bad for tonight's diner en blanc. If you are unaware, (read the link if you must) diner en blanc's first outing in Asia was marred by bad handling. He said, she said, local food was dissed, bloggers were uninvited, bloggers were re-invited, bloggers call for boycott of event and the sky god has spoken. No rain tonight. Maybe a little drizzle, just to tease the organisers.

As for me, hubs is gallivanting all over town today and has refused to buy dinner home. So me and the kids will head for the food court for our in-door air-conditioned dining. We promise not to eat French fries and croissants.


Oh, this weekend I'll be at VivoCity selling my bags and stuff! It's been a while eh? I almost forgot what it's like to sell my stuff. Oh, yes, I'll need to pack.......

p.s. good news. went to see the eye doc again (different doc this time but same cuteness), waited for 2 to 2.5 hours and I DON'T HAVE THYROID. so it's back to the diagnosis that my eyes are allergic to something something. hahahahahahaha. anyway I'm 80% cured and I think I can live with 20% discomfort.

Tuesday, August 28, 2012

Eat My Pouch

Remember the advice I gave before? Never sew when you're hungry? I ignored that advice. Not only that, I sewed, while hungry, using fabric that has food on it. Originally I had bought these delicious fabric to save for a future giveaway. Well, I kept them in the cupboard for a month. Yesterday, I made the mistake of opening the cupboard. Yum. So instead of a random person winning these baked goods theme fabric from me in a future giveaway, a few random strangers will have to pay me to buy these pouches I made.


I kinda like the black fabric more. Would you believe these fabric are from a collection called Queen's Candy? Can you spot macarons on the fabric? I heard of macarons maybe last year? I heard so much about them I had to eat them but could not find them anywhere near where I live. Finally one day I was given some. They were very, very sweet. I found more sold in town and ate some more. They were still very, very sweet. So I'm off macarons now. Because I don't like very sweet food. My teeth literally ache when I think of very sweet food. Ouch already. But what I love about macarons is they melt in your mouth! What exactly is that special ingredient that makes the biscuit crumble so meltingly? I hope one day some bakery here will bake not so sweet macarons.


These local traditional biscuits are what I usually eat. The round ones are called Marie biscuits and they're quite sweet but I can tolerate it. The square ones are soda crackers. I like them a lot because they're plain. Just wish they weren't so oily. I dunk them in hot lipton tea. The traditional biscuits shops sell biscuits by the tin - one big giant tin. I estimate at least 18" tall tin. These traditional biscuits shops are hard to find nowadays. My mother used to carry the tin home and she would get very upset if anyone forgets to close the tin tightly because then, the entire batch of biscuits would go soft. And without fail, someone always does.

Linked to : Sew Many Ways

Saturday, August 25, 2012

The Polarizing Bag


When I showed hubs my new bag, he said it would polarize my customers. He's usually right. So here's my Parrot Bag which you're either going to love or hate.

I had discovered 2 rectangular panels of my Ikea fabric in my stash, had it washed, dried and ironed and they sat on my table for a few weeks. Finally I couldn't stand it anymore and decided I would have to shape a bag based on the amount of fabric available. This is a tedious task and I hardly do it unless I'm plenty motivated.


I really enjoy reading comics and I suspect that having read so much comic strips in my youth, it shaped the kind of blogger and person that I am today. Whenever I can, I try to incorporate some humour in my bags. Both sides of the bag look the same apart from the little extra I added. I'll show you the details later. I already regret using running stitches to sew the embroidery. But it's done.


When I was young, my younger brother and I were really into MAD magazine. We had stacks and stacks of them and we read them over and over again. It helped that we were both into the illustrations. I had even fancied myself becoming a cartoonist but soon realised I lacked the required talent. However my brother who had the talent went on to study graphics design and now he is a ............. entrepreneur.


One of our favourite MAD illustrator was Mort Drucker.


Of course I loved Calvin and Hobbes and enjoyed many Sundays reading the strips.


And The Far side was discovered much later on. I think hubs introduced it to me. I really dig the one panel strip most.

And here's my little attempt at a 2 panel comic strip.
Edit: p.s. I'm explaining the comic so you'll get it.

Parrot A struggles to get to his fish. It's tied to a really long string.

Next to Parrot A is Parrot B who has managed to eat 2 fishes. He's whistling in a smug way.

Yep. So overwhelmed with regret not using backstitch now.

Linked to:
Sew Many Ways...Find a friend!
Six Sisters' Stuff

Thursday, August 23, 2012

How to watermark your images using Overlay

It's no secret that I love PicMonkey and one of the newer features that I really adore is Overlay. With this feature, I am able to watermark my images in a second. Previously, I would add the watermark to every single image, one by one and because I had to use a specific font, I had to go search for the font, etc. Imagine doing that to lots and lots of images. So I wished and I wished and PicMonkey heard my wish!

So I'm going to share with you how I create a watermark which you can use over and over again. Think of all the time you'll save which you can use for something more important like drinking tea.

This is quite an unconventional way of working so I hope you'll bear with me.

Step 1

You need to go Here to download an image I created with a transparent background. It's called transparent.png. And don't freak out when you go to the above link and see an empty file. It's transparent! Save it to your computer. If you have problems going to the link, I suggest you NOT use Firefox as sometimes it misbehaves.

p.s. I'm not showing you how to create a transparent background as you need a software with the capability to do the job.  fyi - I used photoshop elements.

Step 2


Open picmonkey.com and click on "Edit a photo".

Select transparent.png which you had previously saved.


You will see a blank PicMonkey page. It's correct. It's transparent, remember?

Step 3.
On side bar, click on P. This will bring up the text screen. Click on "Add Text".


See the text box in the middle of screen that says "Click here and type"? Enter your watermark. This could be your name, your blog name, your blog url, basically anything that identifies you.


Step 4.
Once you're satisfied with how your watermark looks, click on the first icon on side bar. It looks like atom. It will bring up the Basic Edits screen. Click on Crop.

Do you see how clicking on Crop shows up the transparent background which is in grey? Now you crop the image to whatever size your watermark is.


Do take note that if you've positioned your watermark outside the transparent background (grey area), you need to cancel your Crop and move the watermark within the transparent background or it'll get lopped off.


This is what my final watermark looks like. It doesn't have to fit so perfectly because the background is transparent. The cropping is to reduce the size of the watermark file.

Step 5.
Save your watermark to your computer. Give it a new name. It is very important that you leave the file type as .png otherwise the transparency will not be preserved.


Step 6.
From picmonkey.com upload an image you want to watermark. This image would be your regular jpg images.

Here is where the Overlay magic begins.....

On the sidebar click on the heart/star/speech bubble icon. This will bring up the Overlays screen. See right below the word "Overlays"? Click on "Your Own". Select the watermark file you saved in the previous step. Your watermark will appear ON the image you're editing.


Place your watermark over image at strategic positions, in my case I like it on the bag. The watermark can be enlarged and edited further - colour, fade, blend modes. For me, I just want to be quick. I place it over the image, adjust the size of the watermark and I'm done. Save bag image as per normal in jpg format.


Here's the final result.


Here's another version.


What do you think of this way of watermarking your images? Or do you prefer to add text to every image?

Tuesday, August 21, 2012

Gardens by the Bay

Yesterday was a no-school day and instead of letting the kids stay home and sit on their butts all day playing games, we decided to do something unusual for this family. We went outdoors.

When I said outdoors, I mean outside, out in the open, fresh air, with insects and plants and trees and many, many other people.


Yes, we visited Gardens by the Bay.

We were swept away by the hype. Since Gardens by the Bay opened in June, I had been thinking about visiting it. I'm not really a plants and insects person. I enjoy looking at pictures and illustrations of plants and insects much more. I also have itchy skin so if anyone mentions going outdoors, I immediately feel itchy. I have powerful imagination. Hubs thinks I'm hypochondriac. Well, actually the real reason I wanted to visit was I wanted to see what a one billion dollar garden would look like. Yes, one BILLION. 1 followed by 9 zeroes.

Maybe it wasn't a good idea to go yesterday. I was kinda limping. Yes, another body part of mine requires stem-cell transplant. But it would be difficult to find another day when hubs was off and the kids had no school. So I thought to myself: How big can the Gardens be?

Very, very, very big.


To get to the bay, we had to take a few trains and walk through a tunnel of mirrors. I decided to take a photo of myself walking through the tunnel of mirrors. My son photobombed the pic.

This was where we started. The trees hid how large the gardens are. Just imagine landing space for a few space ships.


It's mostly real trees, shrubs and more real trees. But the real attractions are the Supertrees and the Conservatories which you can get a glimpse of in the distance. We had to walk along a lake which I believe is called Dragonfly Lake because there are dragonflies in the lake.


After trekking what felt like days, we finally came to the first of the Supertrees. Do they look sinister?

In case you're wondering, Supertrees are 25 -50 metres tall high-tech solar-powered vertical gardens which are a cover for their true  purpose - to communicate with E.T.


The top of the Supertrees also act as landing pads for the spaceships.


Further up are the Supertree Grove - in reality just a bunch of spaceship landing pads clustered together. Can you see the bridge? Many humans were up there gawking at the structures. We passed. I have fear of height, remember?


Here you can see the tree structure. No climbing is allowed. Unless you're not afraid of lightning.


Hubs went to great length to take the photo of me and the trees so you can see the structures of the supertrees. Yep, laid on the ground and all. I had to be in the photo so the camera could focus on something big like my head. I just want to say the camera adds 10kg.


Close by is Singapore's Stonehenge more commonly known as Marina Bay Sands. The top of the 3 buildings are meant for the motherships only.


At night the Supertrees Grove come to life. When this image was taken, it wasn't dark enough. The sun had just set. The light display and new age music had not come on yet. Many people with cameras were just hanging around waiting for the performance.


We didn't wait. We were tired and wanted to get the hell out. But we got lost. The signage sucked. We got more lost. It was dark. Finally we found our way out. That's when I saw the light display playing to loud symphonic music from afar. E.T. phone home!


We found our way back to the tunnel of mirrors. I decided to take a photo of myself. My family photobombed. I think son was in the middle of a moonwalk.

Today I'm lying down all day.


Sunday, August 19, 2012

One fabric to rule them all

Hi people,

I think my vision is improving because yesterday morning, I woke up after sleeping for 12 hours (yes, very impressive) and saw how filthy the bathroom was. This bathroom is shared by the kids and hubs but do they clean it? With my almost fully restored eyesight, I simply could not bear the sight of the crap. So I washed it. How did I end up being the only one in my home who cares about cleanliness? To be fair, my son does his share of housework. He helps out a lot, sometimes he takes the initiative and sometimes I have to persuade him to. The other 2 members of the family tie for last place for the amount of housework done.

My right eye no longer feels like there's a golf ball in it. It's more like a pea now. IT'S GOOD. It's progress. All the headaches are gone. I no longer feel pain. It's more like I'm recovering from being punched in the eye. IT'S GOOD. It's progress. The eye cream still stings. Three times a day I act like a baby when I have to put it in my eyes. I close my eyes and wait it out. It's like 5 to 10 minutes. Hubs has started calling me blind woman. "Where's the blind woman?" "Blind woman, come here!" "I have something for you, blind woman."

Yes, I want to punch him in the face too.

This week I kinda felt like I was learning to walk. I hadn't sewed for VivoCity craft market for quite a while and suddenly I didn't know what to. So I wasted a few days playing around with some fabric but I couldn't feel motivated to make anything. Then I decided to start with clutches but it turned out I have run out of magnetic snaps so that became a UFO. Finally I looked at my circus animals fabric and decided I would only sew with that fabric. Yes, my own little challenge.

In any case, I had gotten a little excited working on something. Last December, on the last day at VivoCity, I was probably feeling very high, I asked hubs to write down some notes in his phone. Later he read the notes to me and I couldn't make head or tail. It seems, in my high brilliant state, I wanted to make a zip pouch with the raw on the outside.

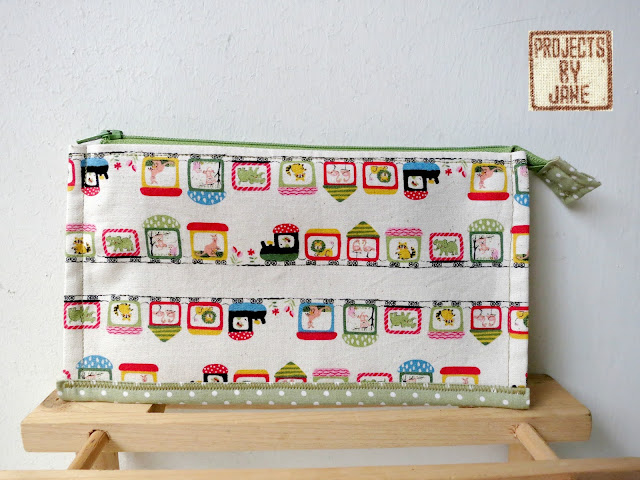
Raw on the outside? That completely made no sense. So I did not pursue it. Anyway, yesterday, I decided to make a zip pouch with the raw on the outside.


Wait. Did you think I would really leave exposed seams on my pouches? I used french seams to sew the edges together. It's sort of a french seams except in french seams you would press the seams to one side but I left mine jutting out. For the bottom, I used bias binding to enclose the raw. I find it unthinkable to handsew the bias binding so I used zigzag stitches instead.

This zip pouch is a lot of work. And it looks a little weird to me. But hubs and my girl love it!


I don't know why I felt I had to push myself so hard but the next thing I made with the fabric was something miniature. This was a tough one. It's a coin pouch in case you haven't already figured it out. I had to use tweezers to sew the bottom. It was so so small I almost screamed as I sewed. I said a lot of bad words. But just look at it. It's so darn cute.


The next one was a no brainer. Two rectangular pieces of fabric = a zip pouch. I made this the traditional way. No tricks, no nothing. But I added a bias binding trim. Which hubs HATES. He said the trim I added spoilt the whole thing. My girl wasn't too crazy about it too.


I had been thinking of increasing my stock of Get Up And Go Go sling bags and was so glad I had enough fabric. I think this fabric print looks really fantastic on this sling bag.


With this cut of fabric, I could easily make anything but I took the easy way out and made a drawstring pouch. This was the 3rd item I made today and was starting to feel my energy sapping.


Last block of fabric. It was getting late and close to dinner time. I asked myself if it was possible to make a very big zip pouch and get away with it. I told myself to go ahead. Halfway, I knew it wouldn't work and had to add handles. Handles are hard to make. So I was really hungry while making this hand carry zip pouch. My advice is never to sew while hungry. I kept seeing food while I sewed.


Although I asked Bear nicely to model the zip bag for me, he stubbornly remained in the shadows.

I used up most of the fabric. I succeeded! What's left are unusable and will be kept for fabric buttons. Now I'm going to eat ice-cream. See you soooooonish.


Linked to these partays:
Sew Many Ways
Blue Bird Sews

Related Posts with Thumbnails

My Bag Pattern Shop

https://www.etsy.com/shop/projectsbyjane

My Applique Patterns

https://www.etsy.com/shop/projectsbyjane?section_id=15580078&ref=shopsection_leftnav_2

My Embroidery Patterns

https://www.etsy.com/shop/projectsbyjane?section_id=15580078&ref=shopsection_leftnav_2