|
| Recessed Zipper Shoulder Bag |
This tutorial is provided free of charge. If you wish to acknowledge me in any way, just link to this post directly.
To use this tutorial successfully, you need to have basic knowledge of how a bag is sewn. This tutorial focuses on adding a recessed zipper to a bag. I have used more photos for the recessed zipper bit only. When it's not too difficult to figure out, I just have a "What you should get" photo. If there's anything I've missed out or if you spot any errors, please put in the comments and I will address them. Thanks. :D

My cut pieces
Note: backstitch all ends.
1. Cut the fabric
a) From pattern provided cut : 2 outer fabric & 2 lining
Get your pattern from my link below. You can download a copy to your computer or you can print without downloading; make sure "scaling is set to
None" or "actual size" to print at 100%.
HERE
Impt: Take the pieces you have cut and measure the top length. (the length which will match the band) Mine measures 10 1/2". If yours doesn't it's okay, just make the length of the band you're going to cut next match
your length.
b) Band - 4 outer fabric (10 1/2" long (or whatever your length is) X 3" wide) Note: If you don't want the band to be so deep, just change the width to something smaller.
c) Please read step 6 before you cut the straps. Straps - 2 outer fabric (26" long X 2 3/4" wide)
2. Interface your pieces if you want to. As for me, my fabric is pretty thick and I don't like interfacing so I'm skipping it.
3. Sew tabs and the zipper to the band.
a) I'm using a 8" dress zipper. I usually use continuous zippers but I'm using a dress zipper here as I think most people would have access to one. If you've never tried continuous zippers, you should try it. It's much easier to sew. Only drawback is the colour available is rather limited.
b) Sew tabs to the end of the zipper. Take 2 small pieces of fabric. (avoid using thick fabric) Put the zipper end in between the 2 fabric right side together.

Sew on the wrong side of fabric close to the metal bits. I use a line to guide me so I don't sew on the metal bits of the zipper. Trim seam allowances.

Flip the fabric right side out. Topstitch. Repeat for other end of zipper.

Cut tabs to size. The length of the tabbed zipper should be about the length of the bands. Mine is just a little short but that's okay because of the seam allowances.
c)

Centre zipper on band and pin with zipper facing down and band right side up.

Sew zipper to band with 1/4" allowance using a zipper foot.
4a) Now's a good time for you to add labels/pockets to the lining if you want to.
b)

Centre band (with zip) on the lining with band right side down and lining right side up.
c)Sew lining to the band. You can use the seam line on the band as a guide.

This is what you should get
d) Repeat for the other side of the zipper to the band and lining

Pin another band to the unsewn side of the zipper with band right side down. See picture above.

Sew band to the zipper.

This is what you should get.
Sew other lining to the band and zipper you have just completed. Make sure the right side of the lining faces the wrong side of the zipper.

This is what you should get.
5)

Sew the side seams of the lining together using 3/8" allowance.
6) Before you sew the straps, make sure you know how to turn a tube inside out. If not, please use some other methods to sew the strap. You will then not follow my measurements for the strap.
Otherwise, carry on...
Fold the strap piece into 2 lengthwise. Iron.

Sew the raw edges lengthwise together using a 1/4" allowance.

Turn inside out. I use a large safety pin.
Iron and topstitch. Repeat for the other strap.
7)Sew the finished strap to the right side of the band 2" away from the side using 1/8" allowance from the edge of the band. 1/2" of my straps are "buried" in the seams but you can do what you like.
Sew the main outer fabric to the above matching the part of the band with the strap attached using 1/4" allowance.
Topstitch the seams. (on the wrong side, the seam allowances should all be facing down)

Topstitch the parts of the strap that crosses the band stopping about 3/4" away from top of the band.
I'm not too detailed for this step but by looking at the photo above you should be able to see clearly what I mean.
Do the same for the corresponding strap. Note: Make sure the length of this strap matches the length of the strap already sewn.
8)

Sew the side seams of the outer fabric together using 3/8" allowance.
9) Now's a good time to do something about the bottoms of the bag if you want to. For me, I'm doing darts. You can leave the bag flat if you like.
p.s. if you want to learn how to draw bag darts, please go to this post:
This is how I draw and sew a bag dart

Sew the bottom of the outer bag together using 3/8" allowance.
Seal up the darts if you are using any.
Do the same for the lining. But leave a gap for turning the bag out.
10.

Match the outer bag with the lining right sides together. Pin along the band. Sew the top of the bands together using a 3/8" allowance. If 3/8" will cut into the strap, use a smaller seam allowance.
11. Turn bag right side out through the opening in the lining. Press. Topstitch the band. It's a little hard to topstitch around the corners. Alternative is to topstitch by hand or just leave it as it is.

12. Close the opening in the lining. And this is how a recessed zipper is done.

Have fun.:D
* * *
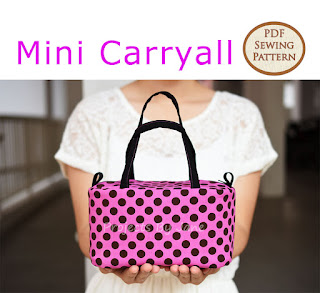
Below are my bag patterns which are available for sale at
Etsy (instant download). Clicking on the images will take you to my Etsy shop.
For more
Applique Resources
For more
Tutorials